Tuesday, August 4, 2015

Home Make Over

Summer - a time to get some things cleaned, organized, painted and off my to-do list.
 
Here are some pictures of my living and dining room make-over. Gone are the tired and dated green and yellow walls replaced with a soft gray.

A new-to-me couch found at the thrift store. I am in love with it! I believe it was meant for me - a gift from God who knew my love for yellow and my very small budget. She was $35! Marked down because she was on the floor for over two months!

The collections have been paired down {really}. I parted with what I didn't love anymore and only kept the things that work in this space.

My white Ikea slipcovers where dyed a gray blue. I went cheap with Rit dye in my washing machine. The dirt is now concealed better and the stains hidden.
I shopped my basement and other rooms in the home to finish the set-up. Mostly it was because my budget was spent and I was out of money but the result is a happy blend of vintage and thrifted treasures that I prefer to new. I am learning to appreciate what I already have.

I'm also learning to be more welcoming and get over my desire for perfection before having friends over. Nobody's house is perfect - nobody's.


Living Room:
Velvet Couch - Salvation Army Thrift Store
White Coffee Table - Church Sale Find
Chairs - Ikea Ektorp
Rocker - Family heirloom
"Hello" pillow - Ross Dress for Less
Pottery, wall hangings, mirrors - found at yard sales, estate sales & thrift stores over the years.
 
Dining Room:
Table - Family Heirloom given to me from my Mom
Chairs - Oakmont Methodist Church - these were their choir chairs
Corner Cabinet - Yard Sale find
Red Primitive Cupboard - Abercrombie's Antique Shop - Mill Village PA
Glasses Cabinet - Craigslist find
Pyrex, Glasses, Seed Packets, Flower Frogs, Hose Nozzels, Misc collectibles - found at yard sales and estate sales over the years.
 
Thanks for stopping to visit.
KayteeJane


Pin It

Best Blogger Tips

Sunday, April 19, 2015

Pyrex Fairy Garden


Disclaimer: no vintage Pyrex was harmed in the making of this garden :)

My daughter Hannah is very much in to fairy gardens. Last year she made her own garden using some some of her own toys and doll furniture. Nightly she would check the garden in hopes that the fairies would come. Eventually the fairies did find her garden and they stayed around all summer - periodically leaving notes and treats for her. She was delighted with it all.

This season she is still interested in making a welcoming home for any fairies who may be traveling by. Luck would have it that I found out about a wonderful fairy garden making class at a local nursery and I signed Hannah up. At the class she had a great time creating a container fairy garden. After watching the professionals at the garden center show how to make a fairy garden, I took their ideas and decided to make my own version - but in a Pyrex bowl. I have a few extra yellow 404 bowls hanging around not being used and figured one of those bowls would be a great container for my new little garden.

Here are the supplies that you will need if you want to make one yourself. You could use a regular flowerpot or any other container that you have around.

1. Potting Soil


2. Plants. The folks at the nursery recommended having one small tree, a ground cover plant and a succulent. I chose Rosemary for my tree - which will grow larger and resemble a tree, Hens & Chicks for my succulent and a small-leaf ground covering called Baby's Tears/Golden Coins. At the garden center they had a whole assortment of plants sized just for fairy gardening. You can see the plant tag below shows a fairy on it. Choosing your plants needn't be complicated - just choose small-sized plants that won't grow very large.

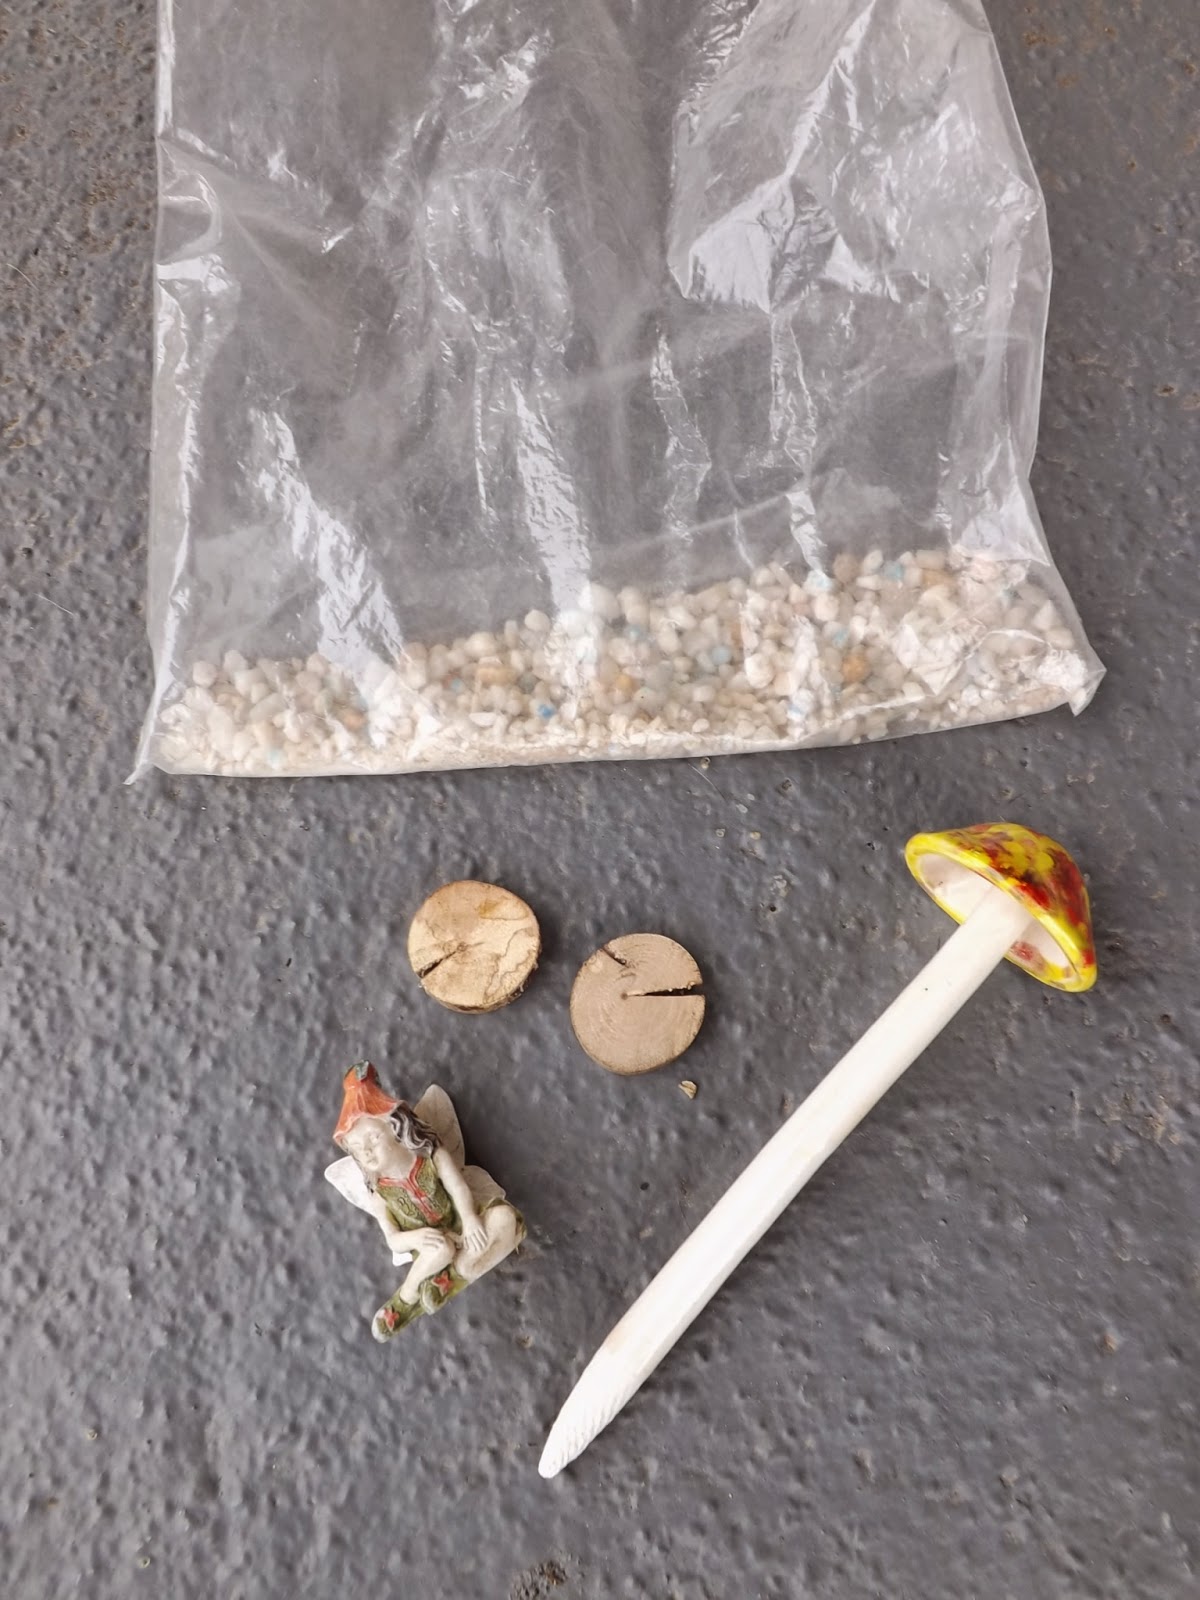
3. Accessories to decorate your garden with.
Here is the fun part! Since fairy gardening is popular now most garden centers and large craft stores sell miniature items marketed for fairy gardening. Caution - most of the accessories are pricey and before you know it you have a small fortune spent in cute things for your garden. Be creative - I'm sure you can find many great things out in nature or in your home if you look around}

For our garden we used small pebbles (think fish tank), small pieces of wood to represent a walking path, a fairy statue & a ceramic toad stool. Other things you could use are sand, small glass pebbles found at the dollar store, miniature furniture, twigs, sea shells, sea glass, pebbles, small pieces of rock.

Here is how we made our garden.
1. I put some stones in the bottom of my bowl for water drainage since I didn't want to drill a hole in the bottom of my bowl. If you are using a standard flower pot with a hole in the bottom you can skip this step.
2. Next fill your pot with soil up to the rim. Pack it down.
3. Once the soil was in we laid out how we wanted the garden to look. Hannah made a pebble pathway through the center of the bowl. You could use stones, sand or small wood pieces here also.
4. Now add your plants. At the garden center they showed us how to cut the plants in half using scissors. I cut this one in half so that I could put it in two different spots.


5. Next add your fun accessories. The possibilities here are endless. There are so many things you could come up with for your garden.

Here are some pictures from our fun day at the nursery. The nursery we went to is Michael Bros. Nursery. If you are in the Pittsburgh area I highly recommend a trip. It is a beautiful family-owned nursery with a large selection of plants, green houses and a great shop. Website found HERE.

Hannah's garden has a lot of cute accessories. She has a little bridge, a mini bird bath and a mini gazing ball. She kept adding stuff that you can't even see the soil anymore! {pictures below}
 
 These are some gardens that were on display at the nursery to give you an idea of what you can do. Each includes the small-sized plants and accessories. They are so cute.
 
I think this one is my favorite with the stone patio.
To achieve this just break apart a larger stone using a hammer.
 
Beach scene fairy garden. Love it!!! Glass pebbles from Dollar Tree.
 

We will keep you posted if any fairies come to stay at our garden!

KayteeJane


Pin It

Best Blogger Tips

Monday, March 16, 2015

Recent Finds

This weekend was the first estate sale that I have been to since winter began. It did not disappoint! I was lucky enough to find these pink beauties - pieces that I did not already have. Just in time for Easter and Spring.


I also bought a stack of vintage linen dish towels. I love vintage towels - so soft and the graphics are the best.


Here are a few of my favorites:


Also bought this Snowflake Garland lidded dish. I am going to use it to hold salt on my counter.

All in all I think I did great for my first estate sale of the season!

I also hit a few thrift shops this weekend. I bought these. Not sure if I will keep them or not. The longer they sit here the more tempted I am to keep them.  I already have so many drinking glasses that it is hard to justify 8 more - but these look so good with my Pyrex. :)


Did you find anything good this weekend? Please share!

Thanks for stopping by!
KayteeJane

Pin It

Best Blogger Tips

Monday, March 9, 2015

Spring is Sprouting Up

Today the weather broke - less cold, more sun.

Spring is sprouting up...a little at a time...both outside and in.

No Easter yet, just a few little touches that show Spring is on the way.

I bought this little doll dresser at a flea market this past weekend. I've always wanted one. A shamrock hankie and a little pixie welcome St. Patty's Day.

A garden elf planter and some spring Pyrex.

Pens in milk glass pots waiting to be used in my journaling bible journaling - {a new hobby}.

Spring Blossom Pyrex and a cute plastic butter dish found at the thrift store.

Daisies from Trader Joes and milk glass - the perfect combo! They last for weeks and make me smile.

A new handmade wreath for the door.

These tablecloths have been stored away all winter in an old dresser. When I sold the dresser last week they were stacked on this chair until I figure out a new place to store them. I realized that it is crazy to own all of these lovely tablecloths and not use them. None of them are "perfect". Many of them show small stains and are super soft from years of use and washing - all the more reason to use them and change them out often!

The first of the tablecloths to make it onto the table - this spring beauty showcasing tulips!

Shamrocks {thanks again Trader Joes} in a vintage planter. 

 A cute vintage milk glass mug found at the thrift store - my favorite kind! {candle sticks in the background are vintage McCoy}


Enjoying the little things!
Blessings,
KayteeJane


Pin It

Best Blogger Tips