Showing posts with label recipes. Show all posts

Wednesday, August 21, 2013

Recipe Box

I recently decided to organize my recipe collection. I was using a 3-ring binder to hold favorite recipes and magazine cuttings. It worked fine but I didn't really like the way it looked. Yes, looks do matter {sorry}. I had this cute antique recipe box already so I decided to put it to good use. I went through my binder and re-wrote all the recipes I wanted to keep on index cards and filed them in here - the rest of the clippings were thrown away.


The system is working well. I am only filing recipes that I've actually tried and liked or are family recipes.

Speaking of good recipes I made an easy snack/dessert recently to share at my weekly bible study. They are chocolate covered fruit kabobs. Here is how I did it.


You will need:
Fresh strawberries - washed and dried
Mashmallows & Bananas
A large bar of Hershey's Special Dark chocolate
Some wooden skewers. I had some very long ones used for grilling so I just cut them in half.
Cut the stems from the strawberries & cut the bananas into small pieces. {I made this dish about an hour before we were eating it so I didn't worry about the bananas turning brown. If you are worried about that you can soak the pieces in a lemon juice/water bath to keep the pieces from browning.}

Make the kabobs by placing a marshmallow, strawberry, banana & another marshmallow on the stick. {Really you can use any fruit combo that you choose.}
Once the sticks are put together I melted the bar of chocolate in the microwave for about 1 minute or so. Use a fork to drizzle the melted chocolate over the kabobs.
I let the chocolate harden {you can speed this up by putting the kabobs in the freezer for a few minutes} then flipped them over and did the other side.
They turned out very cute - and super easy.
Place finished kabobs on a serving plate.
I think I may make these for my daughter's birthday treats to take to school.

These would be delicious with pineapple, strawberry and pound cake with chocolate drizzle or with apple chunks, pound cake & caramel drizzle for fall.
The possibilities are endless!

Hope you like them.
KayteeJane


Pin It

Best Blogger Tips

Wednesday, May 22, 2013

Iced Coffee

Recently on a trip to Kmart I spotted these plastic mason jar drinking glasses for sale.
Of course I had to have one. It was $9.99. I'm so glad I bought one because since then I've been back to Kmart a few times and haven't seen any left. I have a love/hate relationship with Kmart. Sometimes you go there and think "I don't know how these stores stay in business" - they are that bad. But other times I go there and see all kinds of neat things that I've never seen at other "box" stores.  The drinking glasses are double insulated with a plastic straw. The lid is metal. They are made by Aladdin. I have seen mason jar drinking glasses made of clear plastic for sale at Walmart. Also by Aladdin. That version has a plastic lid in vibrant colors like orange, pink or teal. They are cute too. I happen to prefer the blue ones myself because they remind me of the vintage blue ball jars.

One of my favorite drinks in the summer is Iced Coffee. I have bought some lately at both Dunkin' Donuts and McDonalds and was disappointed in the taste. I decided to try making my own. Another benefit is it is much cheaper - and more convenient to do it yourself.

I'm sure there are tons of recipes for making iced coffee available on Pinterest and the internet. Here is my version.

To make my recipe I used a French Press coffee maker. I found mine at a yard sale. They sell them at Target. They aren't very expensive so if you don't already own one it is worth the investment. We also use ours when we go camping to make coffee by the camp fire.
 
(You will want to make this the night before the day you will drink it because it needs to sit in the refrigerator for 12 hours or more).

1. Scoop 5 or 6 Tablespoons of your favorite coffee into the bottom of the press. Pick a nice dark roast. Adjust amount according to your taste.

2. Add water to the grounds. Fill up to the top. (leave about an inch of space at the top for the lid).

3. Mix the water and grounds with a spoon.

4. Put the press in the refrigerator and let sit overnight.

That is all.

5. The next day when you are ready to drink your coffee, use the plunger/press part of the french press to push the grounds to the bottom of the carafe and trap them there. I am using a Bodum brand coffee press - which is a quality brand (available at Target). It trapped all of the grounds and I didn't find any floating in my drink.

6. Pour black coffee into a glass.

7. Add milk or cream and your sweetener. I sweetened mine with sugar but you could add flavored syrup instead. (I didn't have any syrup on hand so that is why I went with granulated sugar.)

8. Mix with a spoon.

9. Add ice and enjoy. Simple as that.

The entire carafe of coffee gave me three full glasses of iced coffee in one day.

If you try this for yourself let me know how you liked it!

KayteeJane


Pin It

Best Blogger Tips

Saturday, December 29, 2012

My favorite find of 2012

Because a new year is upon us, I got to thinking about the things that I found this past year while junk hunting. This year was definatly about Pyrex collecting for me. At every antique store, yard sale & flea market I was on the hunt for a piece of Pyrex to add to my collection.  This snowflake baker was my favorite Pyrex find of the year. I love it's petite size and aqua color. It is only about 1" deep, which makes it perfect to bake up fun appetizers like Hot Sausage Dip - (shown).


I actually owe this find to my friend Alexis. We were out antique shopping this past summer when I stumbled upon this baker for sale. I had it in my hand to buy it, but for some reason I questioned the purchase and almost put it back. I wasn't positive that I "needed" it. What do you really "need" at the antique store really? She convinced me to get it and I'm really glad that I did. I smile whenever I look at it and I think of her at the same time.

Reflecting on the past year has made me realize that I want to scale back my collections and only keep those things that I love and that make me happy. The rest is going to go. This baker - it stays!

Here is the recipe for Hot Sausage Dip in case you want to try it. It would make a great appetizer for New Years. Enjoy!

Hot Sausage Dip

Ingredients:
1 lb. bulk hot sausage
1 chopped onion
1 large or 2 small red or yellow peppers cut into small pieces
oil for pan
1 block cream cheese - softened
small jar of your favorite salsa
1 cup shredded parmesan or provolone cheese

In a skillet with oil cook onion, pepper and sausage. Once cooked allow to cool. Drain grease.
In a seperate bowl mix together cream cheese and salsa. Add cooled sausage, onion & peppers. Mix in cheese. Spread the mixture into a baking dish. Bake at 350 for 30 minutes. Serve hot on Ritz crackers.

 KayteeJane

Pin It

Best Blogger Tips

Thursday, July 5, 2012

Berry Picking

We went blueberry picking this past weekend. Here are the girls in the fields doing the picking.


This is something I like to do at least once a summer. I usually only get around to doing it once, but would do it more often if I lived closer to this farm. There is nothing like the taste and freshness of hand-picked berries. Plus, the cost is so much better when you pick yourself - so you can get a lot more berries for your money.

We came home with 5 quarts of large berries. This is the bag after we snacked and made a batch of blueberry muffins.


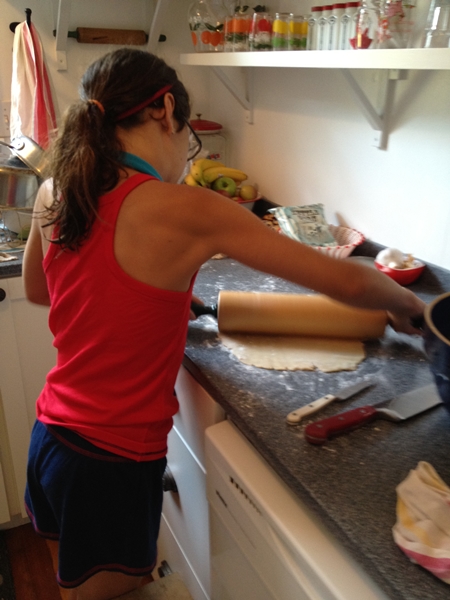
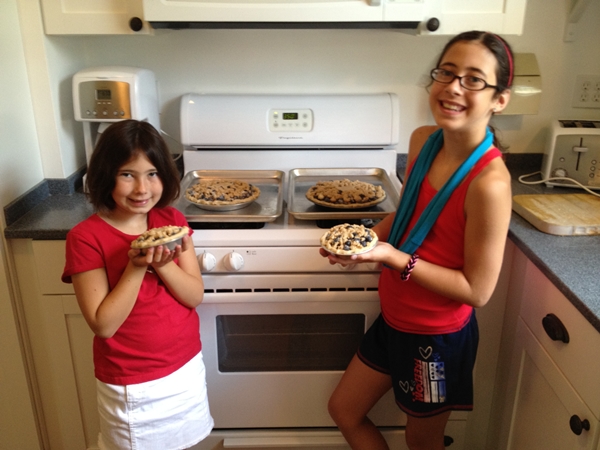
On the Fourth of July I decided to make blueberry pies to enjoy at our picnic later that night. The girls helped also - each one making a mini pie for themself.


I added a buttery crumb topping to the pies instead of a second crust.


Here is what they looked like after baking. The color of the cooked blueberries is such a beautiful purple/red with juice oozing out all over! A cookie sheet underneath is a must.


The pie tasted delicious. It was a lot of work to make, but so worth it in the end result. The taste of the hand-picked berries is so different from the berries you buy at the grocery store. They are full of flavor - very tart yet sweet too. The homemade crust and topping was also delicious. All recipes came from Martha Stewart if you are interested - Basic Pie Crust & Fruit Pie Crumb Topping. I would recommend these recipes and would make them again.


KayteeJane

Pin It

Best Blogger Tips

Sunday, October 23, 2011

Autumn Chex Mix

Serve this yummy snack at your Halloween or Harvest party - or make some just to snack on :).


Autumn Chex Mix

Ingredients:
4 1/2 cups Corn Chex
4 1/2 cups Rice Chex
1 cup Brown Sugar
1/2 cup butter
1/4 cup light corn syrup
1/4 teaspoon baking soda
2 bags of candy corn
5 cups of bite-size pretzels
Non-stick cooking spray

Directions:
In a large bowl place cereals. In a seperate bowl melt butter in microwave. Add brown sugar & corn syrup to melted butter and stir. Add baking soda and stir until dissolved. Pour this over the cereal and stir until cereal is coated with butter/sugar mixture.

Heat oven to 350 degrees F. Cover a baking sheet with foil and then spray with non-stick cooking spray. Pour cereal mixture onto sheet in a thin layer. Bake for 10 minutes or until brown and crispy. Remove from the oven and cool.

Once cereal is cool remove it from the baking tray and put it back into a large bowl. Some pieces may be stuck together. Just break these up with your hands. Add the pretzels and candy corn. Mix it up. Done!

I made some for party favors. I put the mix in canning jars, topped the jars with fabric and gave them away.


Enjoy!
KayteeJane

Pin It

Best Blogger Tips

Monday, August 29, 2011

Enjoying the Last Days of Summer

Hi Friends,

I apologize for not posting for several days :) I am an elementary school teacher and the end of August is always hectic so I haven't had much time for blogging. Thank you to those of you who keep checking in!

Anyhoo...Here are some of the goodies that I've found lately while out at the sales. This past weekend was a better weekend than I've had recently in the way of finding good vintage "junk".

This is my favorite find of recent weeks. It is a child-size shopping cart. This isn't a toy but an actual commercial grade cart made by a manufacturer that makes adult-size carts for grocery stores. This was used in an actual grocery store in my area where the young shoppers could push their own cart through the store just like mom and dad. My kids love it and have enjoyed playing "store" with it. Guess how much I paid for it? Only $3! You know all you moms out there are jealous! (Thanks Stacy - wink! wink!)


I also found this great vintage milk-glass spice set.
It was priced $1. I kid you not! The jars still had spices in them. All the paper labels are perfect.

Hubby and the kids went yard saleing on their own a few weeks back and bought me some treasures. Here is what they found for me.

This tiny metal Fineline eraser box - with the erasers still inside. This is to add to my vintage school supply collection. Actual size about 2" across. They paid $1.

This little pottery bowl set. They paid 75 cents.

A "Big Ben" alarm clock. Price = 50 cents

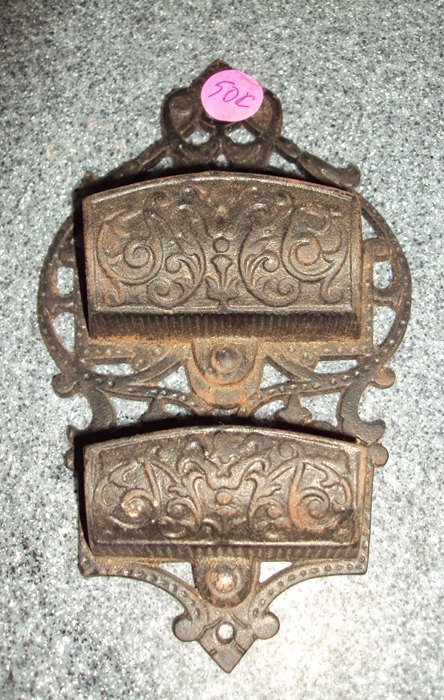
And this cast-iron match holder. I left the price tag on for the picture.

Didn't they do well? They got some great treasures and for so little money.

If you want to see what other yard sale shoppers in blog land found this weekend I'm also sharing HERE at Apron Thrift Girl's Thrift Share Monday.

I've been doing some cooking lately since there are so many delicious vegetables available from the garden right now.
I thought I'd take a small departure from my collections to share with you two recipes that we made this past week.

Mexican Salsa


Ingredients:
Using a knife cut up into small pieces:
6-8 ripe red tomatoes
1 onion - I used a purple onion
2 jalapeno peppers - remove the seeds (I recommend wearing rubber gloves when doing this so that your hands don't get pepper oil on them which can burn your eyes and mouth for several days after handling the pepper.)

also add:
1 cup of finely chopped fresh cilantro or parsley
the juice of 1 lime
3 cloves of minced garlic - or more to your liking
salt & pepper to taste

Serve with tortilla chips. Yum! - Whatever you don't eat store in the refrigerator. Good for up to a week.

Homemade Vegetable Soup


Ingredients:
Olive Oil
4 cups chicken broth
2 cups diced potatoes
2 cups fresh green beans - cut into small pieces
4 cups chopped fresh tomatoes
2 cups of corn - cut off the cob
3 celery stalks - chopped into small pieces
1 onion - diced
minced fresh parsley - about 1/2 cup
minced garlic - about 3 cloves
salt & pepper to taste

In a large stock pot cover the bottom of the pan with olive oil. Cook onions, celery & garlic until soft. Add all remaining vegetables & parsley. Add chicken broth. Cook on a low simmer for around 1 hour or until vegetables are soft. Add salt & pepper to taste. Serve with your favorite bread!

I hope you get a chance to enjoy the last days of summer too by hitting a yard sale or two or by cooking up some delicious, healthy, homemade food using the season's bounty.

Thanks for stopping by! See you soon.
KayteeJane


Pin It

Best Blogger Tips

Saturday, July 16, 2011

S'mores on the Grill

Try this easy way to make S'mores on your grill.

I used the large "Jumbo" marshmallows.


Place a piece of foil on your grill. Don't forget this step or you will have a gooey mess.
Put the marshmallows on the foil - leaving about 2 inches between each marshmallow.
Light the grill, close the lid and let the marshmallows get hot. I kept checking the marshmallows to see if they were ready. It took my grill about 10 minutes on medium heat until they were nice and melted.

They are ready!


Lift each marshmallow off the foil carefully.
The bottom of the marshmallow is toasted nice and brown.


Place the hot marshmallow on top of the chocolate and graham cracker.


Yum!


Pin It

Best Blogger Tips

Thursday, June 9, 2011

A Refreshing Summer Drink

Care to join me for a glass of cool sweet tea? Maybe we could sit on the porch for a spell.
One of my favorite summer drinks is fresh-brewed iced tea. I love The Olive Garden's peach tea so I decided to make my own version.


Add 4 or 5 bags to a pot of boiling water. Adjust this amount according to your taste. Less bags for weak tea and more bags for strong tea.


Once the tea is brewed I add a scoop of sugar (about 3/4 cup) to the warm tea. You can add more or less or none at all depending on how you like it. The tea at Olive Garden is pretty sweet.
Pour the tea into a pretty pitcher and then chill until cold.

Delicious!

Thanks for stopping by.
KayteeJane


Pin It

Best Blogger Tips

Thursday, April 28, 2011

Easy Home-Cooked Dinner

It has been so nice to be able to cook in a functioning kitchen this week. For one of our first meals we made “Durkee’s Chicken”. It is pretty simple. It is just chicken breasts coated with crushed Durkee’s onions and fried. This is a good meal to have on a weeknight when you are tired and want something easy to prepare.
Start with chicken breasts. Coat them in an egg wash and then dip them in a plate of crushed Durkee’s.

Here is Hannah getting into the act.

Frying the chicken in a cast iron skillet.

The cooked chicken coated in fried fried onions.

The final product.


I served these with mashed potatoes & gravy and fresh green beans. If you don’t have any Durkee’s on hand, use up the last bit of a bag of potato chips. That is yummy too.
Enjoy!
KayteeJane


Pin It

Best Blogger Tips