Over the years I have purchased a few antique cast iron bridge lamps at estate sales. They are nice lamps - very heavy cast iron, decorative and vintage for my style. The only draw back to buying these lamps is finding shades for them. The hardware that attaches the shade to the lamp is different than the lamp shades sold on the market today at main stream stores like Target. So essentially if you want a nice new shade for your old lamp you have to find someone who specializes in lamp shades {i.e. - pricey} or find a vintage one. Luckily, two of the lamps that I bought already had shades on them. I thought the shades were ugly but they fit the lamp. Eventually I decided to make them over on the cheap so that they would better fit my home decor. Following is a tutorial on how I jazzed up one of the shades. You could do this technique on any plain shade. I see lots of boring & dated {i.e. ugly} shades/lamps for sale at yard sales. They are usually sold for a fraction of the cost of a new lamp/shade. So if you are looking for something custom without spending a lot of money try this...
Here is the finished shade on the lamp.
My theme for this shade was "Faith, Hope, Love". You could pick any words/phrases you like. I even thought of doing an initial or a number.
This is the shade before.
For this re-do you will need:
* ugly lamp shade
*foam alphabet stamps {mine are several years old made by Making Memories brand for scrapbooking}
*paint
*paint brush
*ribbon
*hot glue & gun
To begin I removed the old trim from the lamp. It just pulled off.
Next I decided what words I was going to stamp on the lamp and then got the letters ready. I happened to have 2 different font sets of the foam letters so I decided to do the words Faith & Love in one font and the word Hope using another font/color.
I decided to use black & white paint for my letters. I just used basic acrylic paint found at Michaels or JoAnn. You will also need a paint brush to apply the paint to the letters.
Apply a thin coat of paint to your letter and then position it where you want on the shade. Press firmly so that the entire letter is stamped. If you look closely at my finished shade you will see that it is not perfect. It is pretty difficult to get a perfect imprint every time. Just know this from the outset so that you know what to expect. You will also notice some random paint marks here and there. This can also happen when stamping when paint gets on the stamp {not the letter} and then makes a mark when you imprint.
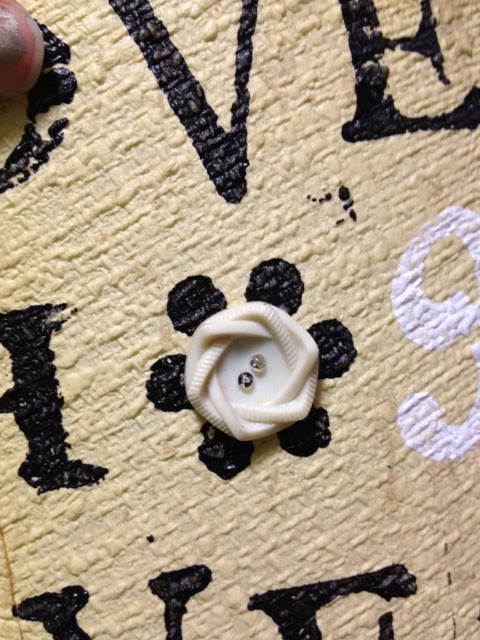
I continued stamping the words around the shade in the following order: Faith, Hope, Love. Between each word I also stamped a flower. At the end of some rows I didn't have enough space for the flower. Each row is slightly different and imperfect. I was able to get 4 complete rows around the lamp.As I mentioned earlier I decided to do Hope in a different font and color for more variety.
Once the shade was finished being stamped I let it dry overnight. The next morning I added black grosgrain ribbon to the top and bottom of the shade using hot glue. I also added some vintage lace trim to the bottom of the lamp over the black ribbon. I just used what I had on hand.
I also added some white vintage buttons over the stamped flowers. I attached these with hot glue. They don't all match. I picked what I had in my button stash.
That is all. It took me about 2 hours from start to finish to complete.

I also wanted to show the other shade that I transformed. I did this one a few years ago and don't have any pictures of the process. The shade looked about the same as the other one before I started. I had a vintage doily that I wasn't using. I cut it so that it would fit around the shade without any excess overlap - just enough that I could fold it over the top and bottom. Once I had it to size I glued it to the shade using fabric glue. Done! This has held up well for several years. The kids have even dropped this lamp a few times on the floor and warped/cracked the shade. I guess the doily has helped to keep it together because it is still being used right now.
I hope you will give this a try sometime!
KayteeJane


 I also wanted to show the other shade that I transformed. I did this one a few years ago and don't have any pictures of the process. The shade looked about the same as the other one before I started. I had a vintage doily that I wasn't using. I cut it so that it would fit around the shade without any excess overlap - just enough that I could fold it over the top and bottom. Once I had it to size I glued it to the shade using fabric glue. Done! This has held up well for several years. The kids have even dropped this lamp a few times on the floor and warped/cracked the shade. I guess the doily has helped to keep it together because it is still being used right now.

This is absolutely amazing! I love the creativity you've got. These ideas are very much impressive. I really love what you've done. Two thumbs up for this.
ReplyDelete-FenchelShades.com